🏠
Section 1.

Help! My Sprite Gets Stuck!

Up to now we have used a simple square to code our game.
This section explains why we did this.
Choosing a sprite with a more complicated shape results in a difficult problem.
In the examples below I use the penguin sprite to show you what happens.
And how to fix it!

When we use a sprite that is a very simple shape then our platform code will work. However, if your sprite is a person (or an animal) with arms and legs sticking out then you will find that sometimes your sprite gets stuck. Anything with bits sticking out will have the same problem. Almost all of the sprites have bits sticking out!

This is why it happens:

Suppose you just moved right and the sprite has stopped at an obstacle.
Our code ensures that it is NOT touching the obstacle.
Then you switch its costume to face the other way.
Something sticking out could now overlap the obstacle.
If it overlaps by more than one step the sprite is stuck.
This is because when we try to move the sprite the code will first take one step.
Then it will notice that it is touching an obstacle and will reverse that step.
So now, we are back where we started.

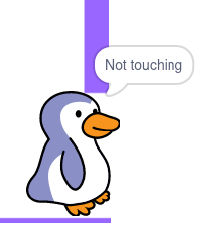
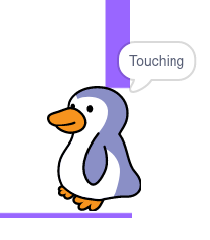
The pictures on the right show that this has happened to the penguin. He is too tall to fit through the gap when he moves to the right. So he stops at the obstacle. When he turns round he overlaps the obstacle and gets stuck.

The easiest solution would be that our sprite's costumes are a really simple shape with nothing sticking out. If you chose a really simple sprite, like a ball, then this would be true. For most sprites, with more complicated shapes, it won't be true. So we have to fix it!
Section 2.

A Fitted Wardrobe

The idea we will use is this:

  1. The sprite will have a costume which is all the other costumes in one big pile. Let's call it 'wardrobe' because it is all the clothes in her wardrobe!
  2. The blocks that move our sprite will have the 'no screen refresh' checkbox ticked. So the things we do while the sprite is moving cannot be seen.
  3. We will have a variable called 'current costume'.
  4. Before we move our sprite we will set 'current costume' to the sprite's costume number.
  5. Then we will change the sprite's costume to the 'wardrobe' costume.
  6. Now we move the sprite. If we bump into an obstacle, we know that all the costumes fit in the place we stop. Because our sprite is wearing all her costumes at once!
  7. Finally we use the 'switch costume' block to switch back to the 'current costume'. We do this using the 'current costume' variable we set at step 4.

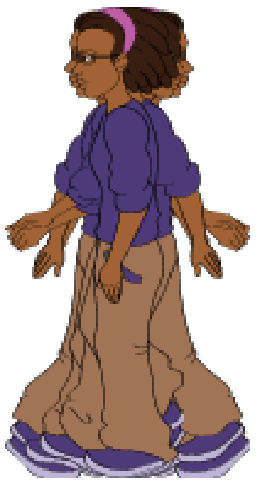
This is what all 8 of Avery's costumes look like when they are all piled up.

Section 3.

Step by Step Instructions

We want a picture of Avery wearing all her costumes at the same time.
If we try to do this in the platform game project the picture will include our platform sprites and the background.

We don't want this.
We want a clean white background.

This is the easiest way to do it:

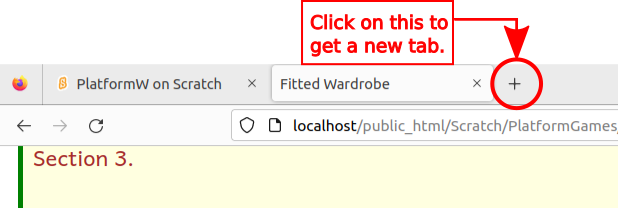
  1. Open another tab in the browser.
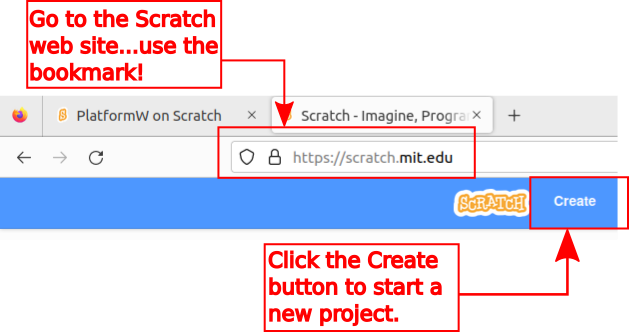
  2. Start up Scratch.
  3. Start a new project.
  4. Select the 'Avery Walking' sprite,
  5. Delete the cat sprite.
Continue with section 4 below.

Section 4.

Creating 'wardrobe'

The easiest way to create the 'wardrobe' costume is to write some scratch code!

The code shown opposite does what we want.

We size the costumes at 100% so that we don't lose too much detail. Otherwise the pictures are fuzzy.

We hide the sprite at the end because if we don't we will have one of the costumes twice.

Run the code, the picture of Avery in all her costumes will be drawn on the stage.


Section 5.

Turning the Picture into a Costume

To turn the picture into a costime we need to take a picture of it.

This is how to do it:

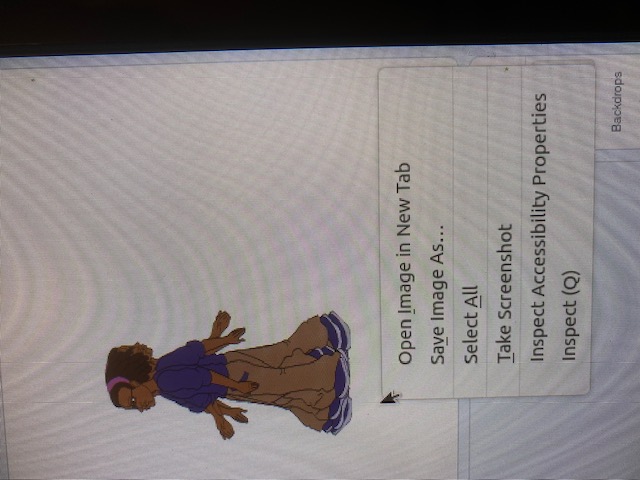
  1. Point the mouse at an unused part of the stage,
  2. Hold down the Ctrl key. It is at the bottom left of the keyboard.
  3. While you are still holding it down, click the RIGHT mouse button.
  4. You will get a little list of things you can do.
    One of them is 'Take Screenshot'.
    Click on that.

Section 6.
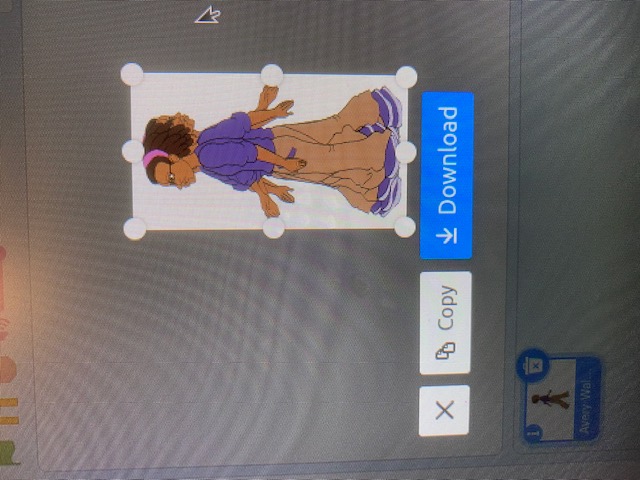
  1. Hold down the left mouse button and drag the mouse across the stage.
  2. You will get a white rectangle.
  3. Move the mouse around the rectangle.
  4. When you see a cross that means you can hold down the left mouse button and move the rectangle around.
  5. When you see a line with an arrow at each end you can hold down the left mouse button and change the size of the rectangle.
  6. Drag the rectangle over Avery. Squeeze it down so it fits as tightly as possible.
  7. Click on the blue 'Download' button.

Section 7.

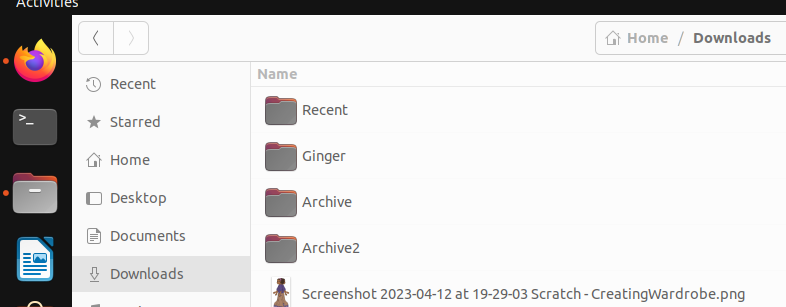
The picture you have just taken is saved to the Downloads folder.
To go to that folder, first start up the Files program.
Then use it to go to the Downloads folder.
Find the picture that you just took.
It will have a long complicated name.
The name is a mixture of the date, the time, Scratch and the name of your project.
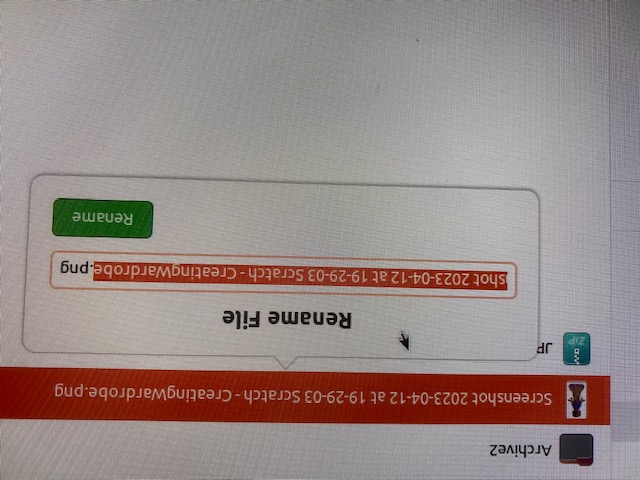
We want to rename it to 'wardrobe.png'.

To do that you just press the 'F2' button.
This button is on the top row of keys on the keyboard.

A window appears with the name of the file in it.
The name is selected which is very helpful because...
When you start typing a new name, the old one disappears.

Type 'wardrobe'.
Leave the '.png' part as it is.
The .png part helps the computer to know that this is a picture.

Click on the green 'Rename' button.

Section 8.

Now go back to your Platform game project.
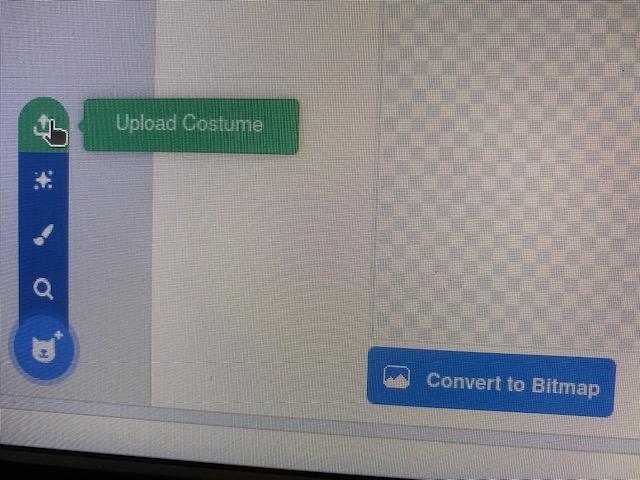
Use the costumes button and choose 'Upload Costume'.
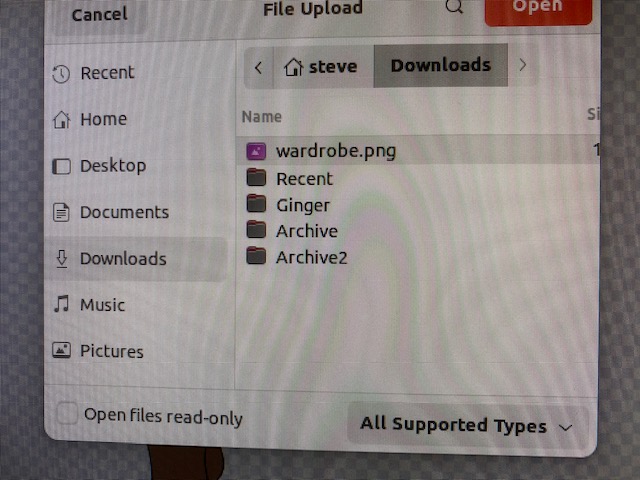
Select the 'wardrobe.png' picture in the Downloads folder.
Click on the pink 'Open' button.
Congratulations.
You have created the costume we need to solve the problem.
And it is now part of our platform game.

Section 9.

We have now created the 'wardrobe' costume. It is nearly perfect but it might not be the right size. I will tell you how to fix that in a moment. If you looked at the sizes of all the four right facing costumes you would see this list:

  1. (a) 101 x 192
  2. (b) 48 x 193
  3. (c) 97 x 190
  4. (d) 47 x 193
The left facing ones are the same sizes.

The first number is the width. The second number is the height. The costumes with the biggest height are (b) and (d), at 193.

Look at the size of the wardrobe costume. If its height is more than 193 we need to shrink it down.

To do this:

  • Go the the costume editor and click on the wardrobe costume
  • Select the entire costume, it should be surrounded by a rectangle.
  • Take hold of a corner with the mouse pointer and push the corner towards the opposite corner.
  • The whole costume gets smaller.
  • Release the mouse button and check the size.
  • Keep doing the above until the costume's height (the second number) is 193.

    Section 10.

    Centre the Costume

    We now need to centre the 'wardrobe' costume.

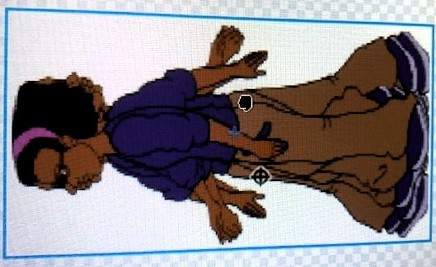
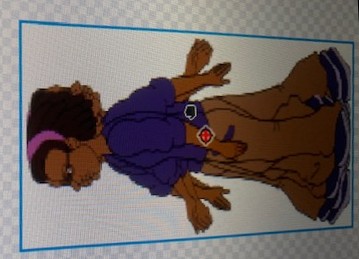
    If you click anywhere in the white rectangle around Avery the costume is selected. By holding the left mouse button down you can move the costume.

    You will see a blue cross in the centre of the costume.
    It is quite small so you have to look hard to see it.
    There is also a circle, with a cross inside it.
    We want to make sure that the costume's cross is on top of this circle.

    Move the costume so that its cross is right on top of the circle with the cross inside it. When you are there, and still holding the mouse button down, the cross goes red. You can let the mouse button go.

    Unselect the costume by clicking outside the white rectangle.

    It can happen that the costume is already in the right place. So you only see the crosses in the pictures after you have moved the costume. Then all you need to do is move it back!

    Now save your project.

    We are ready to write the code which uses the wardrobe costume.

    The first picture shows that
    the costume is not centred.
    The second picture shows that
    the costume is centred.
    Section 11.

    This is the code for moving to the right. We have created a new 'Move Right' block. We are using capital letters for each word this time, instead of the lowercase letters we used before.

    Inside our new 'Move Right' block we carry out the plan that we listed in section 2.

    These are the steps:

    1. Create a new block called 'Move Right'. Check the 'no screen refresh' checkbox. This is so that the screen won't show the individual steps that we do in this block.
    2. Make a new variable called 'current costume', for this sprite.
    3. Set 'current costume' to the sprite's costume number.
    4. Change the sprite's costume to the 'wardrobe' costume.
    5. Switch costume to 'current costume'.

    Section 12.

    Try to write the code for moving left.
    It is very similar to 'Move Right'.
    The answer is hidden so you can try doing it.
    Press the button when you want to see the answer.

    Section 13.

    Try to write the code for moving up.
    The answer is hidden so you can try doing it.
    Press the button when you want to see the answer.

    Section 14.

    Try to write the code for moving down.
    The answer is hidden so you can try doing it.
    Press the button when you want to see the answer.

    Section 15.

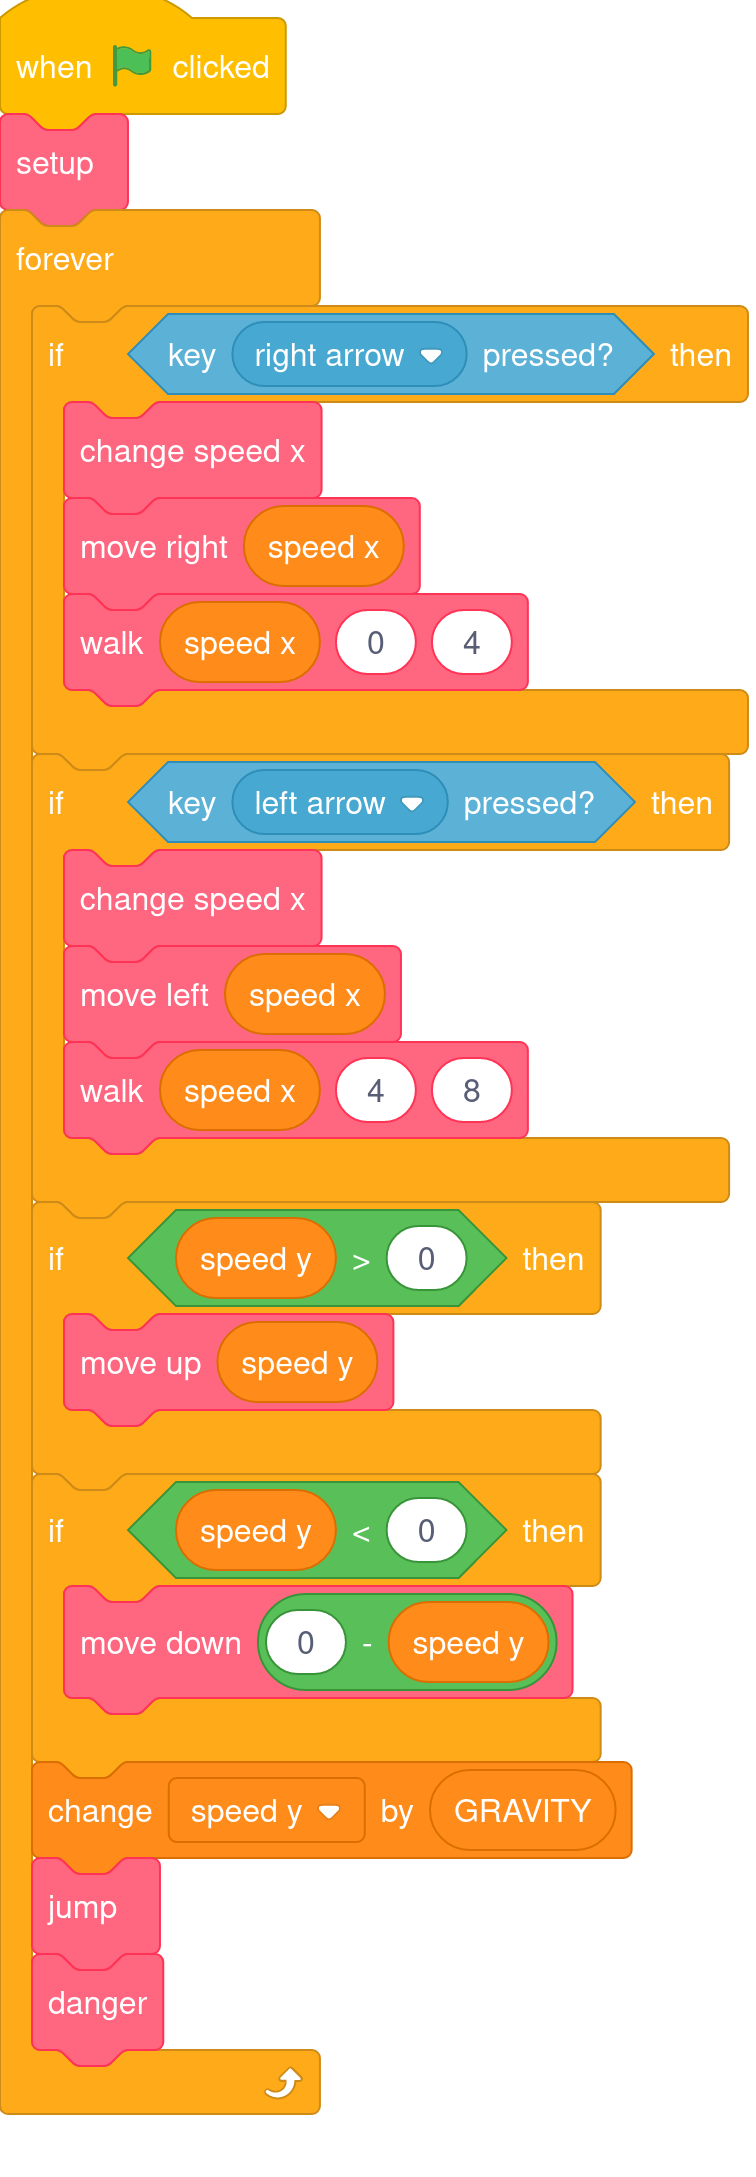
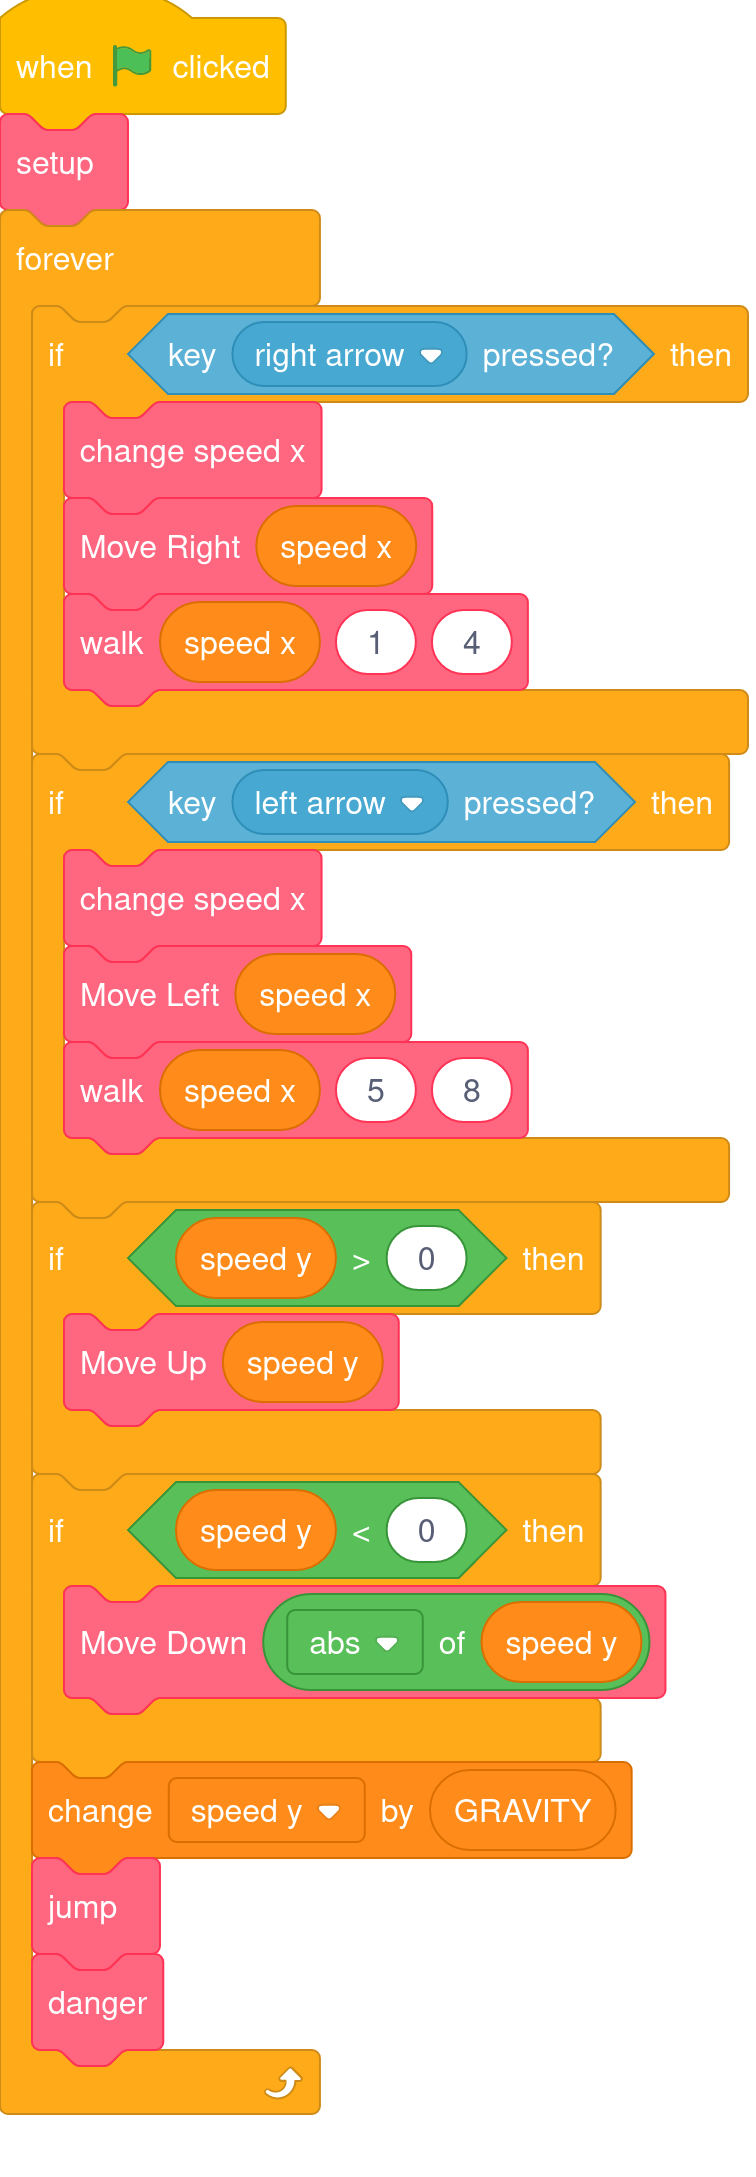
    Well done! After all that coding the only thing left to do is to use the code in our main loop.

    We already have calls to the lowercase versions of 'move right', 'move left', 'move up' and 'move down'.

    We just need to replace those blocks with the uppercase versions.

    The two versions of the main loop are shown below.
    The one with the lowercase names is on the left.
    The one with the uppercase names is on the right.

    🏠