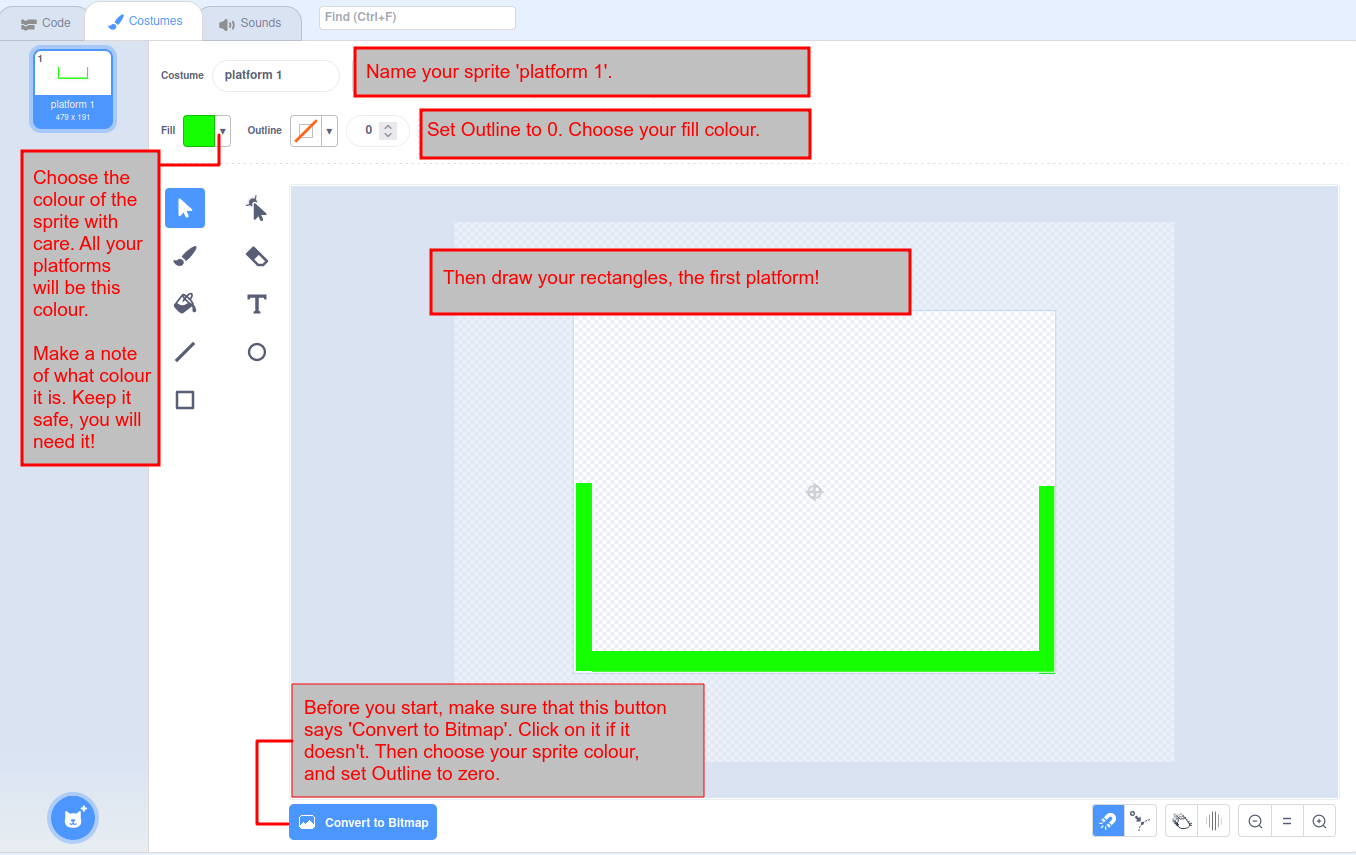
🏠
Section 1.

Getting Started

Create a Sprite

We are going to create a sprite. This sprite will be one of the platforms in the game. We will make more sprites when we need more platforms.

Create a new sprite using the paintbrush button. For now, all we need is a long rectangle at the bottom of the stage. It should have upright ends as shown in the picture. We will use this to test moving to the left and to the right.

We are starting with a very simple platform. Later on we will make it more interesting!

Name your new sprite 'platform 1'.

Section 2.

A Big Secret!

When you start using Scratch it seems like there are lots of sprites. In reality they are all copies of the same thing! They only look different because they have different costumes.

Underneath its costumes, a sprite is just some information inside the computer. The information is a list that starts like this:

When we write the code for a sprite we add our code to it. So now it has information and code. But without at least one costume it would be invisible!

To make a sprite visible it has one or more costumes. When the sprite wears a costume, we can see it.

The sprite is like the engine in a car. We can't see it (unless we open the bonnet) because it's inside the engine compartment. We see the body of the car, when we are outside it. We see the passenger compartment when we are inside the car. This is like our sprite having two costumes.

Section 3.

We can use what we just learned to put off choosing a sprite until later on. We will concentrate on writing code first. We will add costumes to our sprite later on. Then it can be whatever you want it to be.

Important!

Never delete a sprite that has some code. You will delete the code too! Remember what the sprite is:
it's the list of information all sprites have,
plus the code you have written,
plus its costume or costumes.

So, just for now, we will create a sprite that is just a square. A bit dull perhaps, but very quick to do, so we can concentrate on writing our game.

Make your sprite a different colour from your platform. Hold down the shift key to keep it square not rectangular. Centre the square.

We will come back to having a more interesting sprite later on.

Delete the cat! We won't be using him.

Section 4.

Stopping at Obstacles

In our games and animations we will have a sprite moving around the stage. We don't want it to go through obstacles. We need a way to make our sprite stop when it bumps into something.

We might try the code in the picture. But the result is not what we wanted. The sprite stops when it is overlapping the obstacle. We want it to stop just before it overlaps. How can we do that?

Section 5.

A simple way to stop at obstacles is that you take a step. Then you test to see if you are now touching an obstacle. If you are then you move back to where you started.

Create a 'move right' block.

Check the 'Run without screen refresh' option. We won't see that our sprite stops at obstacles by moving forwards and then retreating backwards.

We are using the 'touching color ...?' block to see if we are touching the platform sprite.

In the code we only move one step at a time. In the next section we will change this to move however many steps we want.

Section 6.

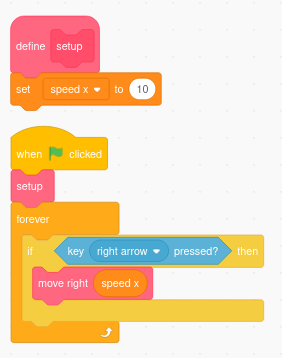
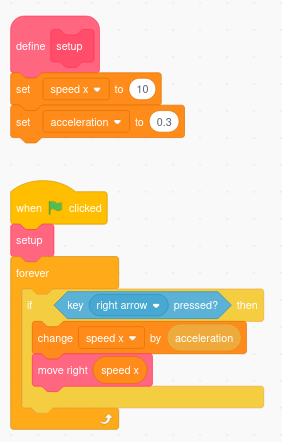
There is a problem with moving one step at a time: it is very slow!

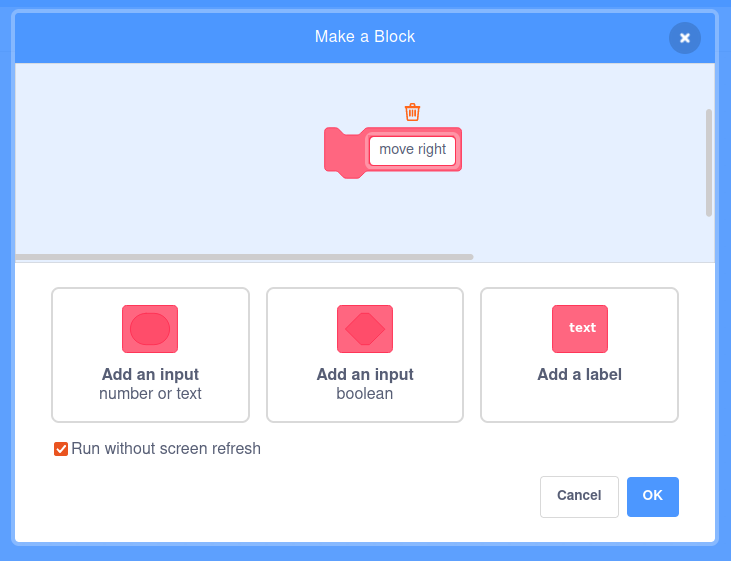
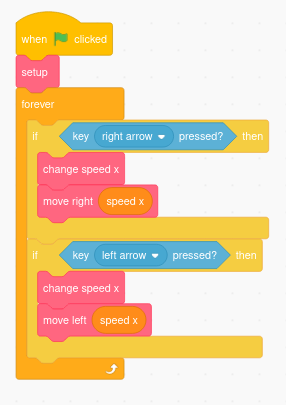
We can fix that by adding an input to the move right block. This input is the number of steps we would like to take. We take this many steps, if we can. We stop if we bump into an obstacle. 
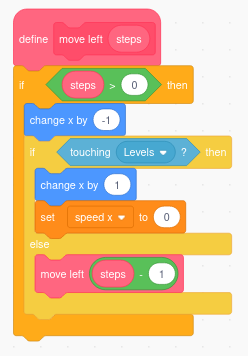
We will call this input 'steps'.

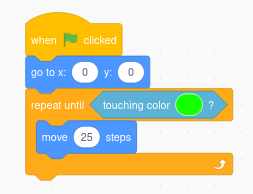
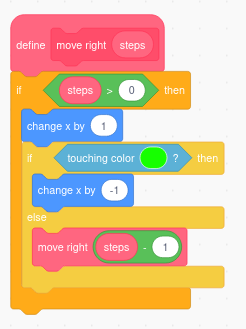
We introduce a new and powerful idea: recursion.

Can you see that at the end of the 'move right' block the block calls itself! This is the key idea of recursion.

To make it work we need some way for the block to stop calling itself. In this example this happens when 'steps' is zero (or less). The if block that tests for this means that the block doesn't do anything at all if steps is 0.

But if steps is greater than zero, it does exactly what we did before but with the extra step of calling itself:

move one step forward
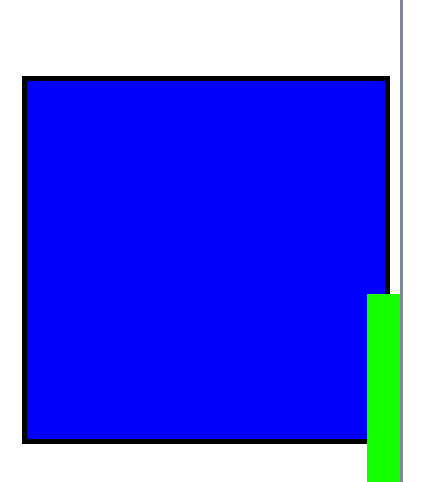
if we are touching a platfom
    move one step backward
else
    call the block again, 
    with the input (steps - 1)
                    
Did you notice that when we call the block at the end, we pass (steps - 1) to the block. This is really important. Each time the block calls itself it must be a bit closer to the part of the code that doesn't call itself. In this example, this means that the number of steps must get smaller and smaller until it is zero. We do this by subtracting 1 from steps each time the block calls itself.

Section 7.

Test

Test your code by putting your sprite near the right hand side of the screen. Then pull the 'move right' block from the 'My blocks' section. Fill in some number of steps to take. Keep clicking on it to move your sprite. It should move until it bumps into the right hand side of the stage.

Section 8.

Every program has a set of blocks that is started when the green flag is clicked. We sometimes call this set of blocks the main loop. It often uses the 'forever' block to keep looping round until the program ends.

Lets start building the main loop of our platform game. All we need so far is:

  1. The 'when green flag clicked' block
  2. The 'forever' block
  3. The 'if key right arrow pressed' block
  4. The 'move right' block

We have just the beginnings of a game: we can move our sprite to the right, across the stage, and it will stop it if bumps into an obstacle.

Section 9.

In the last section the move right block always used 50 steps. The number of steps we take is the speed of the sprite. So let's make a 'speed x' variable for the speed across the stage.

A really important habit to get into is this:

Whenever you create a variable:
at the beginning of the program,
set it to some start value.

A neat and tidy way to do this is to create a new block to set all your variables to their starting values.

Let us call this block 'setup'. For now, it just sets the speed x variable. After we have defined it, we put it at the start of our program.

Section 10.

Here is one way we can make our games more fun to play:
we will add some code so that you can make the sprite speed up
by holding the right arrow key down.

'Speeding up' is called accelerating.
So lets make a new variable called acceleration.
We will put a block in setup to set it to a start value.

The basic idea is that we will add this block just before using 'move right':
change speed x by acceleration.

Section 11.

We have created a bug in the program:
'speed x' increases when we hold down the right arrow key.
But there is nothing to make it smaller!
It will just keep getting faster and faster!

We can change the 'move right' block to fix this.
When the sprite bumps into an obstacle it stops moving.
So we should set 'speed x' to zero.

Section 12.

Did you test the code in the previous section?
Did you try setting the speed x variable to 0?
If you did then you probably noticed that the sprite moves really slowly at first.
It does speed up after a few moments, so 'acceleration' works.
We just need the sprite to move more quickly when it starts up.

We can do this by having a new variable.
We will call it 'minimum speed x'.
Set this to 3 in the setup block.

We will need to use this new variable now.
Later on, when we code up moving left, we will need it again.
So let's put the code that uses it into a new block.
Call the block 'change speed x'

In this new block we test to see if speed x is less than the minimum.
If it is, we set it to the minimum.
If it isn't, we do what we did before: change it by acceleration.

Don't forget to call your new block before you call 'move right'!

Section 13.

Test!

Now is a great time to save your game.
Save it to the cloud if you are signed in.
Save it to the local drive too.
Test the game.

If you change anything, don't forget to:

  1. Retest
  2. Save your work to the cloud and to the local drive again.

Congratulations. We have made a great start on our game.
Next, we will write the code to move left.
This is very easy because it is just like the code we already have!

Section 14.

Move Left

Can you write a block called 'move left'?
It should be just like the 'move right' block in section 11.
Have a go.
There is a picture of it in the next section.

You will need to add some code to the main loop.
The code should work when you press the left arrow key.
It should make the sprite move left.
Section 12 will help.

Section 15.

The Move Left Block

Using the Move Left Block

🏠